这里我们不使用tolua框架本身的项目,而是在我们已有的工程项目中接入tolua热更框架。
引入tolua
下载tolua资源
在引入tolua到我们的项目之前,需要下载tolua的资源包:tolua资源包
资源引入项目中
上面下载完tolua资源后,我们得到 tolua-master.zip 一个,解压后即可看到这样的内容:
1
2
3
4
5
6
7
8
9
10
├─Assets
│ ├─Editor
│ ├─Lua
│ ├─Plugins
│ ├─Source
│ └─ToLua
├─Luajit
├─Luajit64
├─ProjectSettings
└─Unity5.x我们需要的只是Assets中的文件,将Assets文件夹中所有文件都复制到我们项目的Assets目录中。
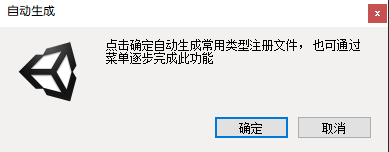
生成常用类型注册文件
将上面文件复制到我们项目对应目录后,在Uinty窗口会弹出这样一个窗口,点确定即可:
起点
在刚引入到项目中的Tolua\Msic中,有一个LuaClient.cs文件,这是tolua为我们封装好的启动接口,可以继承这个类来编写我们自己的tolua管理器,这里我们建立一个LuaMgr.cs,继承自LuaClient,并重写两个接口:InitLoader和LoadLuaFiles
1 | using System.Collections; |
在游戏控制中心脚本GameMgr的Awake方法中,启动lua管理器
1 | using System.Collections; |
启动我们的游戏,此时可以看到打印出这样的信息:
1 | 17:32:10.921-0: LuaState start |
这是在lua中打印出来的日志,具体位置:Assets/Lua/Main.lua
1 | --主入口函数。从这里开始lua逻辑 |
至此,tolua框架算是引入成功了。
目录结构整理
导入tolua资源后,Assets目录结构不一定符合我们的要求,需要根据需要进行调整,tolua框架也支持我们这么做。
修改Generate目录
Assets/Source/Generate目录用来保存tolua生成的可供lua调用的C#类的绑定类,我们项目希望将其放在Assets/Code/Module/Lua目录下,修改只需要打开Assets/Editor/Custom/CustomSettings.cs
1
public static string saveDir = Application.dataPath + "/Source/Generate/";
修改为:
1
public static string saveDir = Application.dataPath + "/Code/Module/Lua/Generate/";
然后将Assets/Source/LuaConst.cs移动到Assets/Code/Module/Lua中,并在此目录中创一个Generate目录,然后将鼠标焦点移到Unity编辑器,又会弹出之前的“点击确定自动生成常用类型注册文件,也可通过菜单逐步完成此功能”窗口,依旧点确定即可
然后就可以在Assets/Code/Module/Lua/Generate/目录中看到一堆*wrap.cs文件,还能在unity编辑器中看到一堆报错
~,这是因为我们自己生成了一份wrap.cs文件,跟原来的那堆文件重名了,只需要把Source目录删除即可,这样就成功修改了存放wrap.cs文件的目录。修改Tolua目录
Assets/Tolua目录是tolua框架的核心库存放的地方,但是我们习惯将第三方插件存放在项目的Assets/ThirdParty目录下,这里我们直接将Tolua目录挪到Assets/ThirdParty目录下,然后修改以下配置:
LuaConst.cs中的toluaDir:1
public static string toluaDir = Application.dataPath + "/ThirdParty/ToLua/Lua"; //tolua lua文件目录
CustomSettings.cs中的toluaBaseType:1
public static string toluaBaseType = Application.dataPath + "/ThirdParty/ToLua/BaseType/";
修改入口文件main.lua的位置
我们希望将lua的入口文件放置到Assets/Code/Lua目录下,只需要将Assets/Lua整个目录移动到Assets/Code下,然后修改LuaConst.cs文件:
1
public static string luaDir = Application.dataPath + "/Code/Lua"; //lua逻辑代码目录
Done